Zipping (Compressing) a Folder
Zipping is the process of packaging a folder that contains multiple files into a single file (called a “Compressed” or “Zipped” file). In addition to combining multiple files into one, the resulting zipped file typically takes up less storage space. Know![]() ing how to zip files is especially useful when you need to send multiple files to someone, for example, through email or an online course. A zip file has a “.zip” file extension and the icon for the zip file typically looks like a folder with a zipper. In order for the recipient to view the files, they would first need to unzip (or Extract) the zipped folder to be able to access the individual items inside.
ing how to zip files is especially useful when you need to send multiple files to someone, for example, through email or an online course. A zip file has a “.zip” file extension and the icon for the zip file typically looks like a folder with a zipper. In order for the recipient to view the files, they would first need to unzip (or Extract) the zipped folder to be able to access the individual items inside.
Windows Explorer allows for the Zipping and Extraction of files. Below is an example of how to zip a folder. In our example, we will be zipping the “Papers” folder that we have been working with throughout this tutorial. Remember, the “Papers” folder is a sub-folder of our “English” folder on the C:\ drive and it contains multiple files. Once the folder is zipped, we can send it via email as a single attachment rather than needing to attach each file individually.
Steps for Zipping a folder using Windows Explorer:
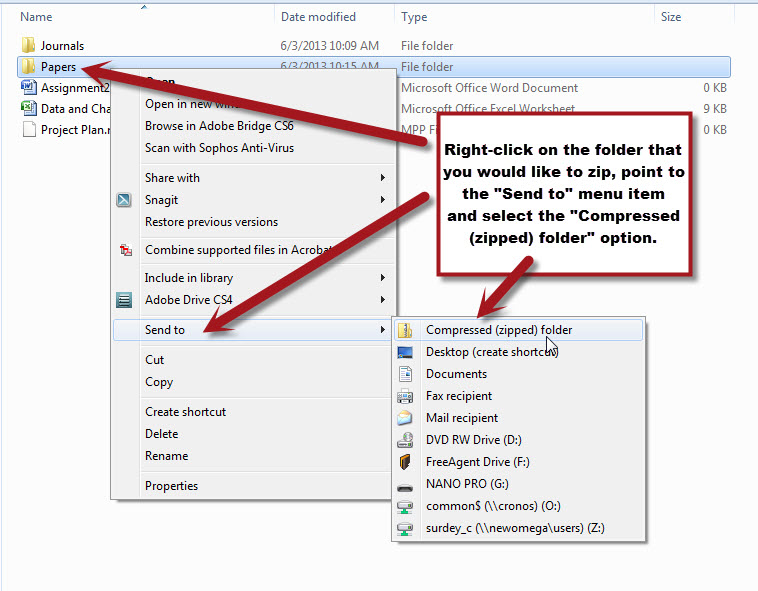
- Navigate to the location of the folder that you would like to zip. Do not open the folder, just click on it once to highlight it.
- Right-click on the folder, point to the “Send-To” option and select the “Compressed (zipped) Folder” option.
- If a border appears around the folder name, Press the Enter Key to accept the default name of the zipped folder.
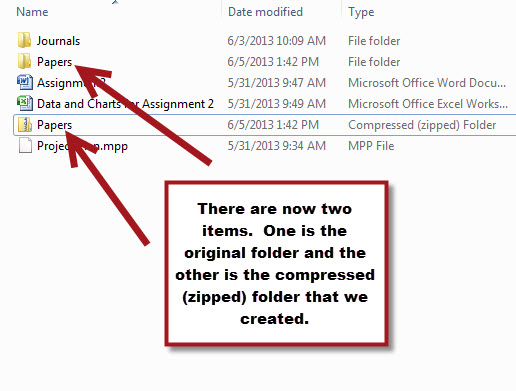
- This will create a second copy of the folder with a “.zip” file extension. The icon of the zipped folders also slightly different than the original as it contains a picture of a zipper on the folder.
- The zipped folder is now ready to be sent. (Please see the “Communicating Using a Computer” area of this tutorial for more information about attaching files.
 Steps for Extracting (Unzipping) a file using Windows Explorer:
- Navigate to the location that contains the zip file. Do not open the folder, just click on it once to highlight it.
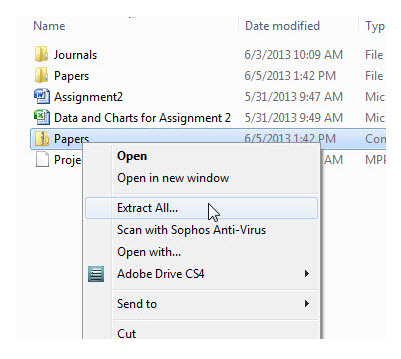
- Right-click on the zip file and select the “Extract All” option from the shortcut menu.
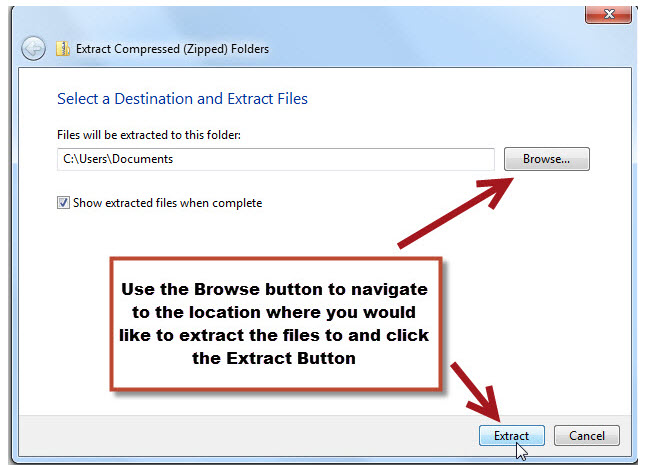
- A screen will appear asking where you would like to extract the files to. Use the Browse button and Navigate to the location you would like. (In our example, the files will be extracted to the “Documents” folder.) Click Extract when the correct folder is selected.
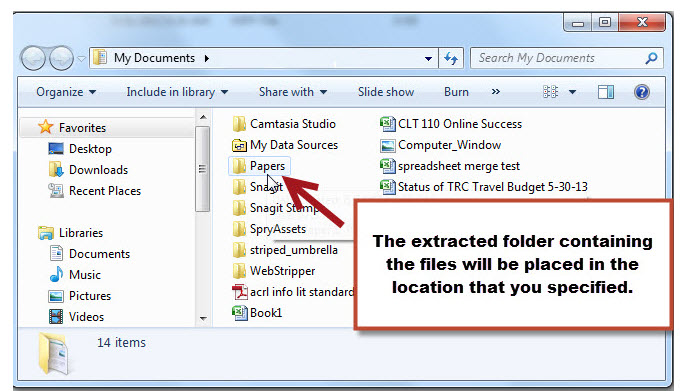
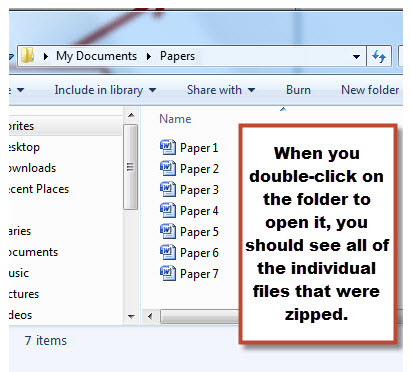
- The files will now be extracted to that location and you should see a folder (which should be named the same as the original folder) in the location that you specified. If you double-click on the new folder, you should see all of the individual files.